Tent Vestibule Design Comparison Guide
By Aisha Mbaye • 10th May
Introduction
You've spent weeks comparing tent specs, read a dozen reviews, and narrowed your choice down to three models, then you see the vestibule dimensions and realize you can't actually picture whether your muddy boots, partner's backpack, and the dog will fit. Tent vestibule design comparison and vestibule functionality analysis are where most buying guides go vague, hiding behind marketing photos and square footage that don't translate to real life.
Vestibules aren't luxuries (they are the practical threshold between the outdoors and your sleep space). Yet the difference between a shallow, cramped entry and a thoughtfully proportioned storage buffer can determine whether a trip feels organized or chaotic, and whether gear lasts for a decade or deteriorates in three seasons. This guide cuts through the design rhetoric and shows you exactly what to evaluate, how to compare honestly, and what repair and durability implications matter for long-term value.
Understanding Vestibule Basics
What Exactly Is a Vestibule, and Why Does It Matter?
A vestibule is the roofed or partial-roof area outside the tent's main body, typically accessed via a door. Think of it as a mudroom (a climate transition zone where wet gear stays separate from your sleeping bag and pad). Unlike a full porch, a vestibule is a semi-enclosed appendage; unlike no vestibule at all, it keeps rain from pooling at your door and dirt from being tracked inside.
Why it matters: A well-designed vestibule is one of the highest-ROI features for both comfort and gear longevity. Poor vestibule design leads to:
- Water pooling at the entrance, forcing you to step through wet debris to enter the tent.
- Door-swing interference with gear and terrain, making entry awkward in cramped campsites.
- Inadequate storm protection for a second backpack or muddy boots, forcing them inside and mixing dirt with your sleeping area.
- Structural weak points: if the vestibule frame or fabric is under-engineered, it's the first thing to fail in wind or heavy snow.
The vestibule is also the first surface that shows wear. Scuffs are stories, not failures, but only if the vestibule is designed to take the abuse and parts are available for repair.
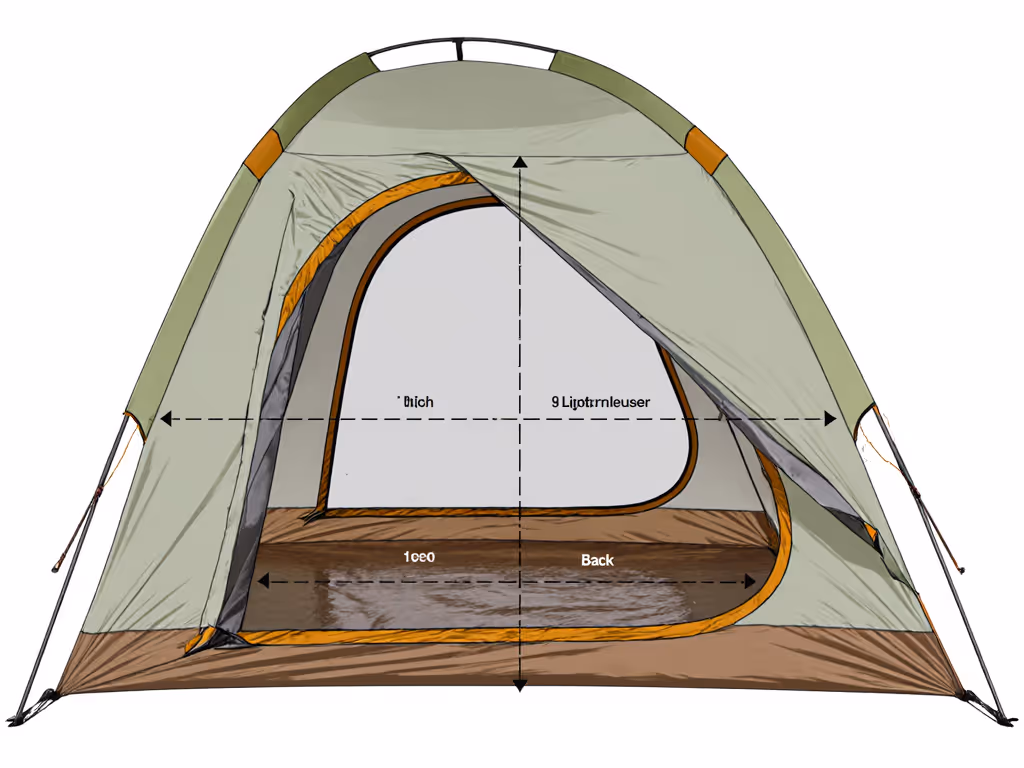
Vestibule Depth, Width, and Usable Volume: Why Specs Lie
Manufacturers often list vestibule depth and width, but not the usable interior height or the taper caused by the rainfly angle. A vestibule listed as "30 inches deep" might have only 18 inches of head clearance at the back, and a sloped floor that narrows the footprint. For decoding manufacturer specs versus real usable space, see our tent measurement standards guide.
What to actually measure:
- Usable depth: From the doorway to the furthest back point where you could realistically store a boot or pack (accounting for floor slope and fabric sag).
- Width at door vs. width at back: Vestibules often taper, reducing storage width as you move deeper.
- Interior height at door and at mid-depth: Most tents show peak height, but you care about the height where you actually lean in to place gear.
- Floor area shape: Rectangular, triangular, or trapezoidal? The shape determines how efficiently a pack or dog fits.
FAQ: Vestibule Design Comparison Essentials
Do I Really Need Dual Vestibule Tents, or Is One Enough?
The trade-off: Dual vestibule tents offer flexibility but add weight, complexity, and more seams and zippers to maintain. Single vestibule tents are lighter and simpler but force a choice: which side of the tent handles gear, and which handles entry? If airflow is your main reason for considering dual doors, compare ventilation design systems to see which layouts actually reduce condensation.
When dual vestibules justify the cost:
- Multi-season or high-volume camping: You're storing muddy hiking boots on one side and a second backpack on the other; weather shifts mid-trip, and you value having an airflow option from both sides.
- Larger groups (4+ people): Two doors mean faster setup and less argument about access during bathroom runs.
- Shoulder-season and variable-weather use: More entry/exit ports reduce the chance of wet gear getting kicked against the sleeping area in hasty entries or exits.
When one vestibule suffices:
- Smaller groups or couples: One door is simpler, faster to seal, and easier to manage in storms.
- Reliable backcountry discipline: You're intentional about leaving wet gear outside or in a separate storage bag, and organization is part of your routine.
- Pack-light trips: The weight savings of a single vestibule (often 0.5 to 1.5 lb, depending on the tent) matter for hike-in distance.
The longevity angle: Dual-vestibule designs have more zippers and fabric joints. Over 100+ nights, more seams mean more potential failure points. If repairability matters to you, verify that the manufacturer supplies replacement zippers and has clear repair paths for each vestibule. A single well-maintained vestibule often outlasts two mediocre ones.
What Makes a Vestibule "Weather-Protected"?
Not all vestibules are equal in a storm. For step-by-step waterproofing and seam sealing that hardens vestibules against sideways rain, follow our guide. The difference between a storm-proof vestibule and a decorative one is:
- Rainfly overhang: The vestibule roof should extend well beyond the door frame, so that wind-driven rain doesn't spray sideways into the entry. Overhang depth of 3 to 4 inches is minimal; 6+ inches is robust.
- Floor seal: Is there a groundsheet or reinforced nylon floor, or just mesh? Groundsheet-less vestibules allow water to wick up from wet ground. A sealed floor adds weight but prevents water infiltration.
- Structural support: Poles dedicated to the vestibule or shared with the tent body? Dedicated poles mean the vestibule can flex independently; shared poles mean vestibule failure could compromise tent structure.
- Ripstop and denier: Vestibule fabric should match or exceed the main rainfly (typically 20D to 40D nylon ripstop). Thin or low-denier vestibule fabric sags faster and tears on snags.
Look for warranty coverage specific to vestibules. If the manufacturer covers vestibule zippers and seams under warranty but not the fabric itself, that signals they're aware of weak spots. Transparent warranties are a proxy for durability expectations.
How Do I Assess Vestibule Accessibility and Functionality?
This is where the gap between marketing photos and reality gets widest.
Real-world accessibility questions:
- Can you reach into the back of the vestibule without crawling inside the tent? If you have to crouch or bend at a 90-degree angle, gear placement becomes a chore.
- Is the door positioned so that gear stacked inside doesn't block the door swing? Some designs force you to pull gear out to open the door fully.
- Can you open the door partway to ventilate without fully exposing the sleeping area? Some doors swing 180° easily; others are cramped or hang awkwardly.
- Are there interior pockets or tie-downs in the vestibule? These prevent gear from sliding forward during pitch or wind.
Test this in person if possible: Lie down inside the tent, reach toward the vestibule, and simulate placing muddy boots or a pack. If you're doing that at a store or demo event, you're getting critical data that no photo provides.
Vestibule Storage Capacity: How Much Gear Actually Fits?
Here's where "20 cubic feet of vestibule space" becomes useless marketing speak.
Realistic storage items and their volumes:
- Hiking boots (pair): ~0.4 cubic feet
- Mid-size backpack (40–50L): ~1.5–2 cubic feet (when stuffed)
- Dog (medium): Needs floor space, not volume - effective footprint ~6 sq. ft. of floor
- Second sleeping bag or emergency gear: ~0.8 cubic feet
- Wet jacket and pants: ~0.3 cubic feet
A 20-cubic-foot vestibule sounds spacious until you realize that tapered geometry, poles, and the actual footprint shrink it to ~12 usable cubic feet. Then subtract the volume for opening the door, and you're left with ~8 to 10 cubic feet of realistic storage. To keep that space functional on family trips, consider dedicated vestibule storage solutions that organize gear without blocking the door swing.
For a typical family of three with one dog: Aim for vestibules that can accommodate boots, one full backpack, the dog's mat, and a second bag or jacket bundle. That's realistically 15 to 25 cubic feet of vestibule volume after accounting for geometry loss. Anything less becomes a game of "what stays outside in the rain?"
Durability and Repairability: Why Vestibule Design Matters for Year 10
The vestibule is the first part of the tent to show stress. UV damage, fabric abrasion, slider failure, and water pooling all concentrate there.
Materials that hold up:
- Nylon ripstop with DCF reinforcement at wear points (door frame, corners): Resists punctures and abrasion better than plain nylon.
- Metal zippers (YKK #5 or #8): Plastic zippers on vestibules are false economy; they jam, crack, and corrode. Metal sliders are repairable.
- Pole-sleeve connections rather than velcro: Velcro vestibule attachments work initially but degrade within 2 to 3 seasons and become drafty. Pole sleeves are more durable.
Repair path clarity: Before buying, check:
- Can you buy replacement vestibule sliders? (Call the manufacturer or check their parts store.)
- Are repair patches for the vestibule fabric available?
- Is the vestibule modular enough that you could replace a damaged section without replacing the entire rainfly?
At a neighborhood repair night, we replaced a broken slider, patched a small tear in a vestibule floor, and tightened guylines (all in under an hour). That tent went from "trash" to three more seasons. When budgets are tight, longevity is freedom; I measure value in quiet nights, not checkout totals. A vestibule designed for repair can add a decade of life to an otherwise solid tent. Brand policies vary widely—check our tent warranty comparison before you buy.
Vestibule Accessibility Features: Door Orientation, Ramps, and Ease of Use
Not all vestibule doors serve the same camper equally.
- Door orientation: Is the door angled toward the most sheltered side of the tent, away from prevailing wind? Or does it face into storms? Some tents let you choose orientation based on site; others lock you into one.
- Ramp or threshold: Does the vestibule floor rise to meet the tent door, or is there a step or lip? A ramp helps prevent water from flowing inward during rain.
- Visibility and light control: Can you crack the door for ventilation without letting light flood the sleeping area? Some vestibules have partial zippers or awnings that allow partial opening.
For families with kids or dogs, ease of access is non-negotiable. A vestibule where a sleepy child or anxious pet can navigate quickly reduces accidents and frustration.
Summary and Final Verdict
What Vestibule Design Should You Prioritize?
For comfort and sleep quality: Prioritize usable depth and width over headline numbers. A 24-inch-deep vestibule with good height is more practical than a 36-inch-deep one that tapers to a crawlspace. Test the door swing and reach; your satisfaction with the tent depends on it.
For durability: Examine materials (nylon denier, seam reinforcement), repair clarity, and warranty specificity. Buy once, sleep well, fix forever when you can, and choose designs where replacement sliders, patches, and fabric repairs are documented and available.
For weather resilience: Look for rainfly overhang, floor seals, and dedicated pole support. A well-engineered vestibule is storm-ready without compromise.
For total cost of ownership: Calculate nights-per-dollar by dividing tent cost by expected usable seasons (typically 5 to 10 seasons for a well-maintained tent). A $200 tent with a fragile vestibule might cost $40 per season; a $400 tent with a repairable, durable vestibule might cost $40–60 per season over 7+ seasons, putting it on par or cheaper over time.
For families and groups: Dual vestibules add flexibility but complexity. Verify that the added weight and parts count justify the benefit for your use pattern. One robust vestibule is often better than two mediocre ones.
The Bottom Line
Vestibule design is where tents reveal their true engineering philosophy. Marketing photos and flattering specs obscure the reality: a practical, durable, repairable vestibule is worth paying for, because it protects your sleep, your gear, and your tent's lifespan. Measure usable capacity, inspect material choices, confirm repair availability, and test the door swing in person. Your next purchase (and the five seasons after it) depends on it.
Related Articles